| |
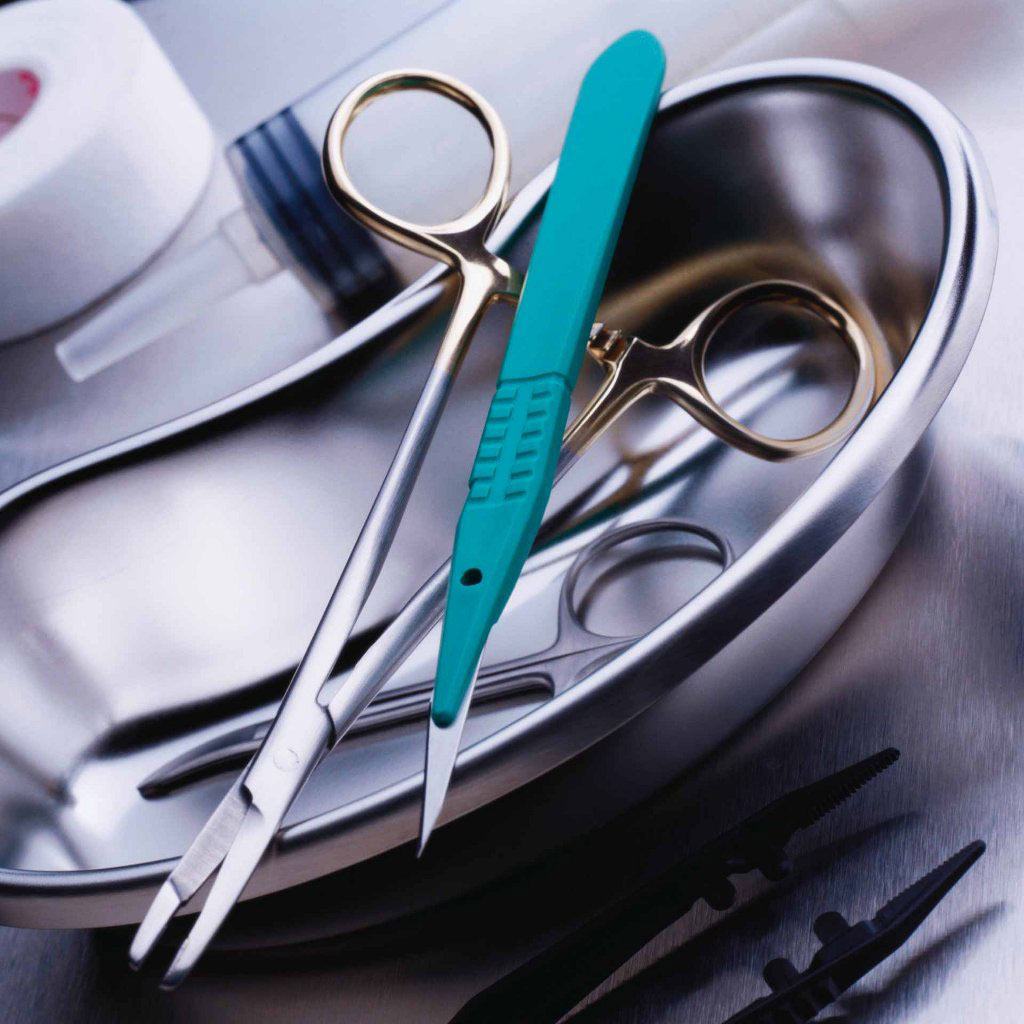
What Is Stainless Steel?Stainless steel is an alloy, which does exactly what its name implies: stains less than ordinary steel (iron). Yes, it can stain, discolor and rust, given the right circumstances. To make iron stainless, nickel and chromium are added in certain quantities, depending on the purpose it is being used for and the qualities required. The more chromium added to the mix, the softer the alloy becomes, something not desirable in a surgical instrument. Given that, quality medical stainless steel alloy is of a very specific, narrowly defined mix. A further aspect of making steel stainless is a repeated process of extracting surface impurities, mainly minerals. And the final high polish of the finished instrument puts a minute protective coating on it, also very important to make the instrument "stain less". Whether the final product is highly polished or mat finished will make no difference in its stainless ability. |
|
| |
How Can I Prevent My Stainless Steel Instruments From Staining?Never remove the final polishing film by rubbing or sanding. Never leave it in tap water for any length of time. Acidic or alkaline pH will remove chromium oxide and chlorite ions will cause pitting. Copper, iron and manganese will cause brown and blue rainbow effects. Distilled water with a neutral ph can be used sparingly. Rubbing the instrument with Surgical Instrument Oil, (also called Instrument Milk) and putting a drop of it between overlapping surfaces, will aid in keeping your surgical instrument for years to come. |
|
| |
I Work In Salt Water?Saline solutions are very hard on stainless steel instruments. Rinsing them in acetone immediately after every use will help. Keeping them immersed in instrument milk when not in use is recommended. But salt water will eventually take its toll. Therefore consider buying titanium instruments. |
|
| |
Why Should I Get A Titanium Instrument?If you must use your surgical instrument in a corrosive environment, or you need a completely non-magnetic instrument, or it has to tolerate heat of up to 440 C or 824 F, an instrument made from titanium alloy can be your answer. Other benefits are: 40% lighter than stainless steel; better strength to weight ratio than stainless steel; better flexibility than stainless steel; it exhibits bactericidal and non-allergenic properties, Consider that it will wear down faster than stainless steel. |
|
| |
How Should I Clean My Instruments?This depends on how sterile your protocol requires them to be. First rinse in pH neutral distilled water and remove blood and debris. Use a fresh neutral pH solvent and then a soft brush for the tough cleaning. If you steam autoclave, make sure that you use manufacturer's instructions for your autoclave (clean neutral pH distilled water), and that your high quality instruments are not mixed with instruments of inferior quality. Impurities from the lower quality instrument can start a corrosive action on your good ones. Be sure that the full drying cycle is used. Overlapping joints may have dampness within the joint, increasing the chance of corrosion. This can be prevented in three ways: assure the full drying cycle is complete, apply silicone grease inside the joint as a protective layer, or by use of an air canister or hair dryer to blow moisture out of overlapping parts. Instruments can also be cleaned ultrasonically but must be immediately rinsed and dried. It has been our experience that the longest lasting instruments are typically the ones soaked in 70% ethanol before and after use, then rinsed and dried. |
|
| |
I Bought Two Of The Same Instruments And They Are Different.High quality surgical instruments are handmade which can lead to some minor variations in the dimensions of instruments, particularly between manufacturing sets. This is sometimes noticeable in the finest spring scissors and the tips in Dumont forceps. |
|
| |
What Does The Black Handle On My Instrument Mean?A black handle on scissors means that the blades are of the Tough-cut series. Made for easily cutting thick tissue, one blade is flat and serrated while the other is razor sharp. A standard scissors has two sharp edges that shear against each other, while Tough-cut scissors have slice action. We recommend Tough-cut scissors when cutting through tough skin, or when making over 30 cuts a day to reduce hand fatigue. Tough-cut scissors reportedly last 25% to 50% longer than standard scissors cutting the same tissue, but they cannot be re-sharpened. |
|
| |
What Does The Gold Handle Mean?A gold handle on scissors, forceps, or needle holders means they have tungsten carbide (TC) inserts on the working surfaces. TC is one of the hardest alloys used for surgical instruments. They are approximately twice as expensive as standard instruments, but can last five times longer, cutting the same tissue. This can be very cost effective in the long run. |
|
| |
My Instruments Are Rusting. What Should I Do?Proper cleaning of your instruments right after use is the first step to prevent rusting. In most cases, what is perceived as rust is really dried blood, which, if left on the instrument will start corrosive action. Soak instruments right after use in a dish of pH neutral distilled water or a solution of neutral pH detergent. A soft toothbrush will help remove the softened materials. Soak up to an hour and never re-use solution. Rinse in distilled clean water and dry with clean lint free cloth. Be sure overlapping surfaces are completely dry; a hairdryer will help here. Ultrasonic cleaners can also be used, but be sure to follow manufacturers instruction fully, particularly in the concentration of the solution to be used. Instruments can also be steam sterilized; but follow manufacturers instructions. Use only distilled water; be sure to run the drying cycle to its end, so that instruments are completely dry; never mix good quality instruments with those of inferior quality, as impurities from the poor quality instruments could settle on your good ones and start a corrosive action. |
|
| |
Is There Any Information On The Corrosion Of Laser Lettering On Instruments?Laser labelling is a procedure used for identifying medical instruments. Etching is the conventional method of marking and identifying instruments and laser labelling must also be clearly visible and resistant to standard conditions of use and (re)processing. Provided correct procedures are used for laser labelling, none of the letters will corrode. Corrosion of laser labelling is usually due to insufficient guidelines or faulty procedures in the labelling process. We are not aware of any literature on this issue. At this point, however, we should also like to point out that any factor triggering or promoting corrosion such as contact with water containing high amounts of minerals or salts should be excluded during reprocessing. |
|
| |
Is iI Sufficient To Immerse The Surgical Instruments In A Disinfectant Solution Specified By The Manufacturer In Order To Use These Instruments On Other Patients? Isn't iI Necessary To Sterilize These Instruments Each Time?Instruments used in invasive surgery must be sterilized after reprocessing. A steam sterilization procedure in accordance with EN285 must be used for steam-sterilizable instruments to achieve this. Thermally unstable instruments must be subjected to a low-temperature sterilization procedure in conformity with the manufacturer's instructions. Make sure you also observe the RKI (Robert Koch Institute) recommendations on reprocessing medical devices published in November 2001. These instructions can be downloaded under www.rki.de. |
|
| |
Is It Possible To Leave Instruments Unprocessed Overnight Or Over The Weekend? Is Wet Disposal By Immersion Over Night Or Over The Weekend A Possible Alternative?Practical experience has shown, that soiled instruments can be left untreated up to 6 hours after their application without affecting the cleaning in the machine. If the instruments are stored over night or over the weekend, sufficient cleaning cannot be assured. In addition there is the risk of corrosion due to blood that adheres over a long period or due to a physiological salt solution. If soiled instruments are stored over night or over the weekend you must expect corrosion. |
|
| |
How To Passivate Surgical Insturments Made By Stainless Steel?Passivation is a process in which you remove stray iron particles from the surface of stainless steel, and/or enhance the formation of the chromium oxide layer that makes stainless steel resistant to corrosion. It is commonly done in nitric or citric acid formulations.
By saying "passivation" I believe you mean the thin protective coating film formed on the articles.They are primarily chromium oxides(Cr2O3).We require a minimum level of 12%Cr to ensure a passive layer. Your query does not indicate the "grade" of stainless steel you have used. I feel "austenitic" stainless steel is the best choice. If you have already used this grade then the problem could be some thing else for which I need the exact description of the "corrosion" pattern and how it looks like on the instrument...
Much of the surgical instrument industry has gone to using CitriSurf products for passivation. These instruments are commonly 410ss or similar, with laser etching. The laser etching is a very weak point in the corrosion problem and must be passivated to pass the autoclave tests.
The trick is to get the passivation required without removing the laser etch marks that the manufacturer wants to remain. This can be attained with a significant improvement in corrosion resistance over the old nitric acid methods layed out in QQ-P-35c. |
|
| |
How To Improve Sainless Steel For Medical Instruments Tubing?Continuing advances in surgical techniques are requiring more instruments that use metal tubular components. The requirements placed on these instruments by the surgeon have become more demanding as the surgical procedures become more complex and confined. As a result, selection of the proper material from which to make the tubular component has become more complex. Proper material selection is critical to the development of the most cost effective instrument; one that not only performs as intended, but that can be fabricated in an economical manner. The optimum material is rarely the least expensive material.
Historically, enhanced strength UNS S30400 (AISI Type 304) stainless steel has been the material of choice for the tubular components in dental and surgical instruments. While this alloy has worked well for the first generation of instruments designed for use in confined spaces, it has some drawbacks that limit its usefulness for instruments employed in the more aggressive surgical procedures performed today. These drawbacks include loss of strength during welding, poor edge retention, poor wear resistance and poor galling resistance, all of which are desired in today's instruments.
Stainless steel alloy development has yielded a number of stainless steels with materials properties that make them worthy candidates for medical instrument tubing. Each of these alloys offers enhanced properties over those offered by UNS S30400.
The following review of desired material properties and the alloys that offer them is designed to help the instrument designer select the optimum material. |
|
| |
Why We Should Use Corrosion Resistance (Bio-Compatibility) Of Stainless Steels?The first attribute of a material used for a surgical instrument is its corrosion resistance. Historically, the inherent corrosion resistance of stainless steel has been deemed adequate for surgical instruments. In today's environment improved corrosion resistance is considered a must. It is crucial to consider not only body fluids, but pre- and post- surgical instrument cleaning techniques when determining the level of corrosion resistance required. Table No.1 shows the relative corrosion resistance of alloys that are considered to have acceptable bio-compatibility for medical instruments. When more corrosion resistance is required because of cleaning or sterilizing solutions, an alloy further to the right should be considered. |
|
| |
What Are The Strength And Toughness Of Stainless Steels?Medical instruments designed today frequently are required to be thinner and longer. This design requires the use of materials with increased toughness, fatigue strength and tensile strength. All of these properties are interrelated. Generally, as the strength and hardness increase, the ductility and toughness decrease. The degree to which this occurs differs among the alloy families and to some degree within a family. Table No. 2 illustrates the combinations of properties and the alloys available to achieve them. |
|
| |
What Are Edge Retention, Wear And Galling Resistance Of Stainless Steels?When an instrument is used for cutting or shaping, edge retention becomes one of the critical material properties. If a cutting edge becomes dull prematurely, the instrument becomes difficult and potentially dangerous to use.
Wear and galling resistance are crucial when metallic parts move in relation to each other in an instrument. If wear or galling occurs during use, not only will the instrument stop performing properly, but it may also introduce metallic debris into the wound.
The edge retention or wear resistance of a metal is determined by the material's hardness and how that hardness is achieved. Generally, as the hardness of a metal increases, so do the edge retention, wear resistance and galling resistance.
The edge retention of a martensitic stainless will be better than that of a precipitation hardening stainless or austenitic stainless at the same hardness due to the wear resistance of the hard carbides in the martensitic stainless. |
|
| |
What Are The Effects Of Welding?Frequently it is necessary to weld one or more components during the fabrication of a medical instrument. Consider the effect of the welding operation on the material's properties and the processing necessary to overcome any negative during the instrument design and original material selection phases.
The heat generated when a metal is welded causes metallurgical changes which differ with each alloy family. These changes range from softening the metal to making it very hard and brittle. While the welding method can influence these changes, all fusion (Metal Inert Gas - MIG, Tungsten Inert Gas -TIG, Laser, and Electron Beam - EB) welding processes cause them to occur. These effects tend to be less severe with Laser and EB welding than with MIG and TIG welding. Resistance and inertia welding minimize these changes. These changes and corrective heat treatments are summarized in Table No. 4. |
|
| |
Which Alloy I Should Use?The wide variety of material properties available in these alloys gives the design engineer the opportunity to develop instruments that are uniquely suited to the application.
In large part, as the demands placed on an instrument by the procedure and surgeon increase, so do the demands placed on the material from which that instrument is made.
Some instruments, such as trocars, that are not subjected to high stress or torsional loads and are not used for shaping, frequently may be made from UNS S30403 (Type 304L) stainless steel.
Long slender instruments, such as drivers or arthroscopic instruments, are likely to have high demands placed on them. The increased strength and toughness of UNS S46500 (Carpenter's Custom 465 stainless) are put to good use in these types of instruments. The alloy's high hardness and resulting edge retention, while not as good as a martensitic stainless of similar hardness, is more than adequate for many cutting and shaping applications.
Cutting and shaping instruments, such as shavers or samplers, require an alloy like UNS S42010 (BioDur TrimRite) or UNS S42000 (Type 420) that is hard and has good edge retention. The wear and galling resistance of these alloys is beneficial in insuring smooth operation when the instruments contain parts that move in relation to each other.
The information discussed above is intended to assist the instrument design engineer in identifying alloys to be consider for a particular application. A qualified metallurgist or materials engineer should be contacted for detailed information about material properties as they relate to the specific instrument being designed. |
|
| |
Who We Can Make Scissors Testing?Until recently, it's been difficult to gauge if scissors were performing optimally. To test them, surgeons often tried cutting a piece of material, but this yielded inconsistent results due to the variety of materials used. Today, there is a rubber-like material known as Theraband to test scissors' sharpness.
Medium-grade red Theraband is used for scissors
measuring 4.5 inches to 12 inches in length
Yellow Theraband is used for scissors measuring 3
inches to 4 inches in length
Make several complete cuts through the material, cutting all the way to the distal tip (where scissors most often dull). This test will indicate satisfactory sharpness. |
|
| |
What Are The Difference Between Rust vs. Stain?Stains can be removed, whereas rust will leave permanent damage. To determine if a brown or orange discoloration is a stain or rust, use the eraser test. Rub a pencil eraser over the discoloration. If the discoloration is removed with the eraser and the metal underneath is smooth and clean, this is a stain. If a pit mark appears under the discoloration, this is corrosion or rust.
Trouble-Shooting Stain Guide for Surgical Instruments
Stain Color: Brown/Orange
Cause: A result of high-pH detergents, Chlorhexidine usage, or improper soaking of instruments. This color stain can also be caused by soaking in tap water.
Stain Color: Dark Brown
Cause: Low-pH instrument solutions. The brownish-colored film may also be caused by a malfunctioning sterilizer. Similar localized stain spots can also be a result of baked-on blood.
Stain Color: Bluish Black
Cause: Reverse plating, when instruments of different metal (e.g., chrome and stainless steel) are ultrasonically processed together. Additionally, exposure to saline, blood, or potassium chloride will cause this bluish black color.
Stain Color: Multicolor
Cause: Excessive heat by a localized hot spot in the sterilizer. The rainbow-colored stain can be removed.
Stain Color: Light- and Dark-Colored Spots
Cause: Water droplets drying on the instruments. With slow evaporation, the minerals sodium, calcium, and magnesium left behind can cause this spotting.
Stain Color: Bluish Gray
Cause: Liquid (cold) sterilization solutions being used beyond manufacturer's recommendations.
Stain Color: Black Stains
Cause: Contact with ammonia or a solution containing ammonia.
Stain Color: Gray
Cause: A liquid rust remover being used in excess of manufacturer's recommendations.
Stain Color: Rust
Cause: Dried blood that has become baked on the serrated or hinged areas of surgical instruments. This organic material, once baked on, may appear dark in color. Also can be caused by soaking in tap water. |
|
| |
What Are Different Kinds Of Problems And Coloring That May Affect The Instruments?Light or dark spots
Slow evaporation of water condensation on the instrument will cause light or dark spots. Mineral deposits left behind after the water has evaporated is the result of using tap water. The use of distilled or demineralized water will eliminate the problem.
Spots can also be the result of opening autoclave door before steam has been completely exhausted,which causes a slow drying process.
Another cause of spotting can be traced to reusable instrument wrappers. During laundering procedures it is important that the detergents are thoroughly rinsed out. Any residues will be carried on to the instrument surface during steam sterilization.
Brown Stains
A dull brown or blue stain usually is a simple build-up of oxidation on the surface of the instrument.
That stain is more detectable on a dull (mat) finished instrument than on a bright (mirror) surface.
It is the formation of chromic oxide, a very thin hard layer which forms naturally on the surface of stainless steel to prevent atmospheric corrosion.
Blue Stains
A dull brown or blue stain usually is a simple build-up of oxidation on the surface of the instrument.
That stain is more detectable on a dull (mat) finished instrument than on a bright (mirror) surface.
It is the formation of chromic oxide, a very thin hard layer which forms naturally on the surface of stainless steel to prevent atmospheric corrosion.
Purplish-Black stains
May result from contact with ammonia. Many cleaning compounds contain ammonia which remains on the Instrument if not rinsed thoroughly. Can also result from amine deposits traced in the autoclave or steam pipes. Follow autoclave cleaning with a cycle of distilled water.
Rust spots
It is unlikely that surgical grade stainless steel will rust. What appears as rust is actually residual organic matters or mineral deposits in box locks, ratchets, serrations, hinges etc. which have been baked on to the surface.
Sterilization of stainless instruments together with plated instruments of dissimilar material should be avoided. Chipped or imperfectly plated carbon steel instruments will cause rust deposits on stainless steel instruments. Electrolytic action will carry carbon particles from the exposed metal on to the stainless steel surface. These particles promptly oxidize and the stainless steel instrument appears to have rusted.
A rust-colored film on instruments can be caused by the high mineral content or by the use of water softeners.
Corrosion
Presence of blood and soil in box locks, ratchets, serrations, hinges etc. can cause corrosion.
More care should be taken in cleaning. Excessive moisture left on the surface of the instrument can lead to corrosion. Preheat the autoclave, do not rush the drying time.
Foreign matters deposited in the autoclave can result in spotting and corrosion of instruments.
Inner surfaces of the autoclave should be given a routine maintenance. Wipe down with acetic acid (equal parts of vinegar and distilled water) to remove any impurities.
Stress corrosion can be caused by not opening box locks during sterilization procedure. The heating-up and cooling-down process during sterilization causes tension in the material.
Pitting
When instruments are exposed to saline solutions, blood, iodine, potassium chloride and other compounds pitting will occur. Instruments should be rinsed thoroughly immediately after exposure.
Pitting can also be traced to detergents with a high pH level (B-9) used for instrument cleaning. Instruments should be thoroughly rinsed after cleaning.
It is impossible to completely restore an instrument after pitting or rust has eroded the hard surface. The instrument should be replaced immediately as a pitted instrument is far more susceptible to further corrosion.
How to Treat Brand-New and Repaired Instruments ?
Brand-new instruments and those returned from repair must be removed from their transportation packaging before storing and/or inclusion in the instrument usage and processing cycle. Any protective caps or foils must also be removed.
Before using brand-new and repaired instruments, they must be sent through the entire processing cycle in the same manner as used instruments.
The cleaning step should never be skipped because residues (e.g from packing materials or care agents) could lead to the formation of stains or deposits during sterilization.
Always check cleaning results by visual inspection. As a rule the instruments should be visibly clean after the cleaning stage.
The passive layer of brand-new instruments is necessarily still thin and so these instruments tend to be more sensitive to critical treatment conditions than are older instruments.
Brand-new instruments and instruments returned from repair may only be stored at room temperature in dry rooms or cabinets.
Otherwise Condensate may build up inside plastic packages as a result of temperature fluctuations. This may cause subsequent corrosion damage.
Instruments should never be stored near chemicals such as active chlorine which emit corrosive vapors.
To avoid mechanical damage during processing, microsurgical instruments should be stored in suitable racks or retainers right from the start.
|
|
| |
How To Treat Brand-New And Repaired Instruments?Brand-new instruments and those returned from repair must be removed from their transportation packaging before storing and/or inclusion in the instrument usage and processing cycle. Any protective caps or foils must also be removed.
Before using brand-new and repaired instruments, they must be sent through the entire processing cycle in the same manner as used instruments.
The cleaning step should never be skipped because residues (e.g from packing materials or care agents) could lead to the formation of stains or deposits during sterilization.
Always check cleaning results by visual inspection. As a rule the instruments should be visibly clean after the cleaning stage.
The passive layer of brand-new instruments is necessarily still thin and so these instruments tend to be more sensitive to critical treatment conditions than are older instruments.
Brand-new instruments and instruments returned from repair may only be stored at room temperature in dry rooms or cabinets.
Otherwise Condensate may build up inside plastic packages as a result of temperature fluctuations. This may cause subsequent corrosion damage.
Instruments should never be stored near chemicals such as active chlorine which emit corrosive vapors.
To avoid mechanical damage during processing, microsurgical instruments should be stored in suitable racks or retainers right from the start. |
|
| |
Treatment Recommendations For Returned Goods?In our context, returned goods are defined as packaged medical devices which, irrespective of whether they have been used or not, are returned to the manufacturer.
The reasons for return can be manifold: necessary repair or servicing; return of leased instruments: for checks to be carried out on products that are being clinically tested; in the case of complaints; return of
explants for scientific investigation or damage analysis, etc.
Note that an infection risk exists for any person dealing with products actually or potentially contaminated. It is most important to minimize this risk by implementing adequate and reliable treatment processes.
The above guideline implies that goods may be returned only if they:
have been properly disinfected and declared hygienically safe
are visibly marked as ″non-decontaminated" and delivered in sufficiently safe packaging.
The decontamination of products to be returned should be carried out as soon as possible after use, as in the normal supply and reprocessing cycle. This prevents subsequent damage e.g. pitting, caused by blood chlorides.
However, decontamination is not indicated where such treatment would alter or destroy the product, prevent proper analysis, or distort its results. If in doubt, consult the manufacturer of the product. |
|