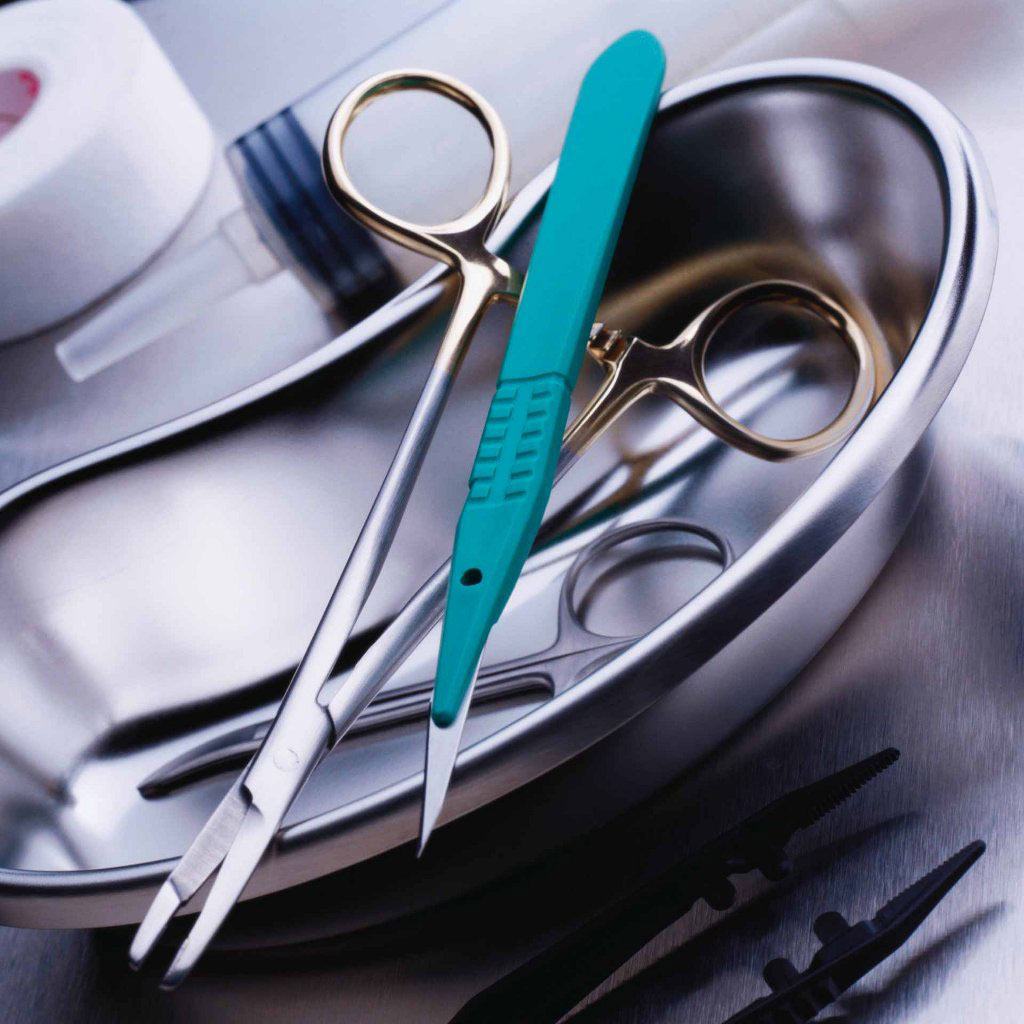
Surgical Instruments
Warning
- Our Instruments are made by qualified technicians, machines and raw materials according to international standards.
However, we are not medicine or surgeons, Risk management, Instruments care guide as well as Frequent asked questions should be read, and respected. It is only a guide and does considered neither an educational material nor comprehensive information.
- Our instruments are made from stainless steel. Stainless steel contains nickel and chromium. A small percentage of the population is known to be allergic to these metals. If an allergic reaction occurs, direct patient to consult physician.
- Before cutting/using wire, place gauze or cotton roll next to wire end to prevent scrape of wire fragments. Safety glasses 4 recommended when using hand instruments.
- Only use the instrument for its intended purpose. Only qualified persons should use the instrument.
- After use, instruments should be inspected carefully by qualified personnel. If the instrument has oxide layer or spots or cracks or scratches, or pit, or hole, or worn out blades, or inefficient cutting, or dull surface or rust then do not put the instrument into services.
The Look and Feel of New Instruments
Most professionals will recognize that new instruments feel different. Newer devices ten to be harder, with a stiffer feel to them. That’s because as instruments age, they soften with use and cleaning. With proper care, these devices can last a lifetime. It’s important to realize, however, that even the highest grade instruments will experience at least minimal wear and softening over time. Remember that new instruments are designed to be stiff at the onset of use. The idea is to keep this wearing to a minimum with proper cleaning and a scheduled preventative maintenance program
Care of Your Instruments
- Use instruments only for the purpose they were designed for.
- Handle instruments gently – avoid bouncing, dropping or overstraining.
- Soak instruments in Haemosol etc. to loosen blood and soil from box locks, ratchets, hinges etc. Clean instruments immediately after use to prevent blood and other debris from drying on to the surface. Blood causes a stain which is difficult to remove, and saline solution is highly corrosive to stainless steel.
- Rinse all cleaning residue thoroughly off the instrument.
- Use distilled or demineralized water only for washing and rinsing as well as for sterilizing, along with a nylon brush, nylon pot scrubber and low-sudsing, near-neutral detergent (pH 7-a). Normal tap water will leave deposits on the instruments due to the high mineral content.
- Do not use steel wool, wire brushes, highly abrasive cleaners or detergents with a high pH (B-9) as this will damage the passive layer or skin of your instrument. The so-called passivation process during manufacturing forms a thin protective film on the surface of the stainless steel instrument. Through constant use and repeated processing an instrument will actually passivate itself. Older instruments are well protected by a tough layer of passivation as a result of hundreds of washings, dryings and sterilizations.
- Keep box locks and ratchets open when cleaning and sterilizing instruments. Disassemble all instruments with removable parts
- Immediately after cleaning dip instruments in a water-soluble lubricant such as Instrument Milk…… etc. Do not rinse or wipe off – the protection film of the lubricant should remain on the instrument throughout sterilization and storage. If ultrasonic cleaning methods are used it is essential to lubricate with Instrument Milk.
- Keep box locks, ratchets, hinges and serrations Free of any debris. If substances are allowed to build up in the box lock the instrument will become stiff and be subjected to misalignment and cracking.
- Thoroughly dry the instruments before wrapping them. Any remaining moisture, particularly in the box locks, hinges and crevices may result in corrosion.
- Make sure your reusable instrument wrappers are rinsed thoroughly to remove all residues of the detergents used for laundering, otherwise staining or corrosion might occur during steam sterilization.
- Never mix stainless steel instruments with instruments of dissimilar material (carbon steel, copper, brass, aluminum). If a plated instrument is chipped or peeled an electrolytic action will carry particles from the exposed metal on to the surface of the stainless steel instrument. To eliminate problem replace all plated instruments with stainless steel, if possible.
- Never put stainless steel instruments and plated instruments together in the ultrasonic cleaner, as electrolysis will cause corrosion or etching on the stainless steel instruments.
- Avoid contact corrosion. Always keep stained or corroded instruments away from impeccable stainless steel instruments.
- Make sure all detergents and lubricants are pH neutral. Tungsten Carbide tips and inserts can deteriorate prematurely. Strong ALKALINE solutions (over pH 7) will attack and actually break down the tungsten particles. If your solutions turn out to be strongly ACID (below pH 7) you have found the cause for breaking down the cobalt binder which holds the tungsten and the carbon particles in position – the insert is losing its hardness.
Maintenance is essential for providing the Best Surgical Procedures and for Protecting Your Investment
Cleaning and instrument inspection after Surgery
The washing process should begin within 10 minutes after surgery, even if sterilization will take place much later. Washing instruments within a few minutes of surgery is your best defense against corrosion, pitting, and staining.
Use only approved solutions. Non-approved solutions are any that do not specifically state on the label that uses include surgical instruments, stainless steel, and sterilization.
Approved solutions are specially designed for surgical instruments and the sterilization cycle. Their product labels will state this use.
Sufficient cleaning standards are absolutely vital for’ successful sterilization. Instruments to be sterilized must be macroscopically clean, i.e. free from visible residues This is checked by visual inspection.
Critical areas such as handle structures, joints or jaw serration (particularly atraumatic toothing) require especially careful checking.
It is advisable to use working lights with magnify lenses of 3 to 6 diopters when checking the instrumnets.
All instruments with lumens, such as cannulas or tube shafts checked for obstructions. Clogged instruments must be reprocessed. If this does not help, such instruments must be replaced.
Poorly cleaned instruments must be re-cleaned (as described below) and then rinsed sufficiently:
Manual cleaning, if necessary with ultrasound , Immersion in a 3% H202 solution (for approx. 5 minutes)
Instruments with hairline cracks in the joint areas, as well those that are damaged, distorted or otherwise worn, must be replaced because their functionality can no longer be fully guaranteed and considered as major risk during operation.
Maintenance and care measures are usually carried out prior to the functional check.
Maintenance or care means targeted application of instrument milk the joints, hinges, locks, threads or friction surfaces of instruments such as clamps, scissors or punches, after they have been carefully cleaned and disinfected.
This prevents metal-on-metal friction and therefore constitutes a preventive measure against corrosion.
Requirements for care agents for surgical instruments
- Paraffin/white oil basis
- Suitable for steam sterilization and vapor-permeable.
Never process instruments with unknown care agents containing unknown materials because they might not only adversely affect the instrument’s functionality (ease of movement) but also the steam sterilization results as well as it might affect patient safety.
Allow the instruments to cool down to room temperature before opening and closing the instruments because otherwise metal abrasion might occur when the parts rub against each other. Such “fretting” would impair the instrument’s ease of movement or even destroy its functionality altogether.
Spraying the instruments or applying the care agent mechanically is not sufficient, nor does it provide additional corrosion protection. Dipping baths should not be used because of the germ infestation hazard.
Never process plastic surfaces with instrument care agents.
As surgical instruments are made for specific application purposes, the functional tests must be carried out so that items that fail to serve their intended purpose are reliably recognized and discarded. If in doubt, consult the instrument manufacturer for suitable testing methods.
Articulated and threaded instruments must be lubricated before subjecting them to a functional test using a squirt oilier or through targeted application of drops of oil. Separable instruments are tested in their assembled condition. Instruments due for repair must be sent through the entire processing cycle.
Microsurgical instruments must be stored in special racks that prevent transportation damage. If indicated, suitable facilities should be employed to secure them against dislocation Dental instruments are usually serviced in the same manner as surgical instruments.
Sterilization
All surgical instruments must be sterilized prior to surgery to prevent infection. But even sterilization can leave contaminants behind if instruments are not properly cleaned. To prevent this, sterilize instruments with the ratchets open. This allows for better steam penetration. Plus it prevents the box locks (hinge area) from cracking.
If using a pan or tray, we recommend perforated. This will also enable better steam penetration, and aids in more effective drying as well. For efficiency place heavy instruments at the bottom and lighter, more delicate instruments on top.
If sterilizing in paper or plastic pouches, do not stack pouches on top of one another during sterilization. When possible, use a spiral metal letter holder as a standing aid. This will permit proper steam flow.
Ultrasonic Cleaning
A method of cleaning that is growing in popularity is ultrasonic cleaning. This method is, by far, the most efficient and effective available today. Its ease of use and superior efficiency is quickly making ultrasonic cleaning the preferred choice for today’s surgeons.
In fact, ultrasonic cleaning is 16 times more efficient than hand-cleaning. Place instruments in the ultrasonic unit for 10-15 minutes and use a neutral pH solution. Here are a few more tips for ultrasonic cleaning:
Before placing into the ultrasonic unit, clean instruments of all visible debris by washing them in an approved instrument cleaning solution.
Don’t mix dissimilar metals (such as aluminum and stainless) in the same cycle. Make sure instruments have plenty of room. Don’t overload your ultrasonic cleaner.
As with all types of cleaning, open all instruments so ratchets and box locks are fully exposed to the cleaning process.
Upon completion of the cycle, remove instruments immediately, and rinse them.Dry thoroughly with a towel, ensuring that no moisture is left on the instruments.
The use of water in an ultrasonic cleaner is not recommended. A neutral pH ultrasonic cleaner solution, when properly mixed, effectively reduces the surface tension of the solution and increases the ultrasonic cavitation process.
The solution should be changed at least daily, or sooner if the solution appears dirty or murky.
Steam Autoclave
Wrapping Materials, Surgical Towels, and Drapes
Wrapping of surgical instruments is essential in the sterilization process. If your practice uses re-usable towels and drapes, please be certain to use as little laundry detergent as possible. Towels and drapes can retain soap particles. During the autoclave cycle, steam passes through the fabric, picking up these soap particles and depositing them on the surface of the instruments. One suggestion for preventing this is to run an extra rinse cycle to remove excess soap particles. Also, if your instrument packs are coming out wet, we suggest a towel be placed inside the pack to absorb moisture
Lubrication
One of the easiest, yet most effective ways to keep instruments in excellent condition is to lubricate them after every cleaning. Proper lubrication keeps instruments from rubbing and scraping, thus preventing dulling and strain to joints and hinges. Moving parts on instruments, such as joints, box locks, ratchets, and screw joints, should be lubricated regularly. Before autoclaving, lubricate all instruments that have moving parts. Only use surgical lubricants because they are steam-penetrable.
Cold Sterilization
This is not a recommended method of disinfecting for high-quality surgical instruments. Immersing instruments for long periods of time in any solution can prove damaging. Never leave instruments in any solution for longer than 20 minutes. Do not immerse instruments with tungsten carbide inserts (gold handles) in solutions containing Benzyl Ammonium Chloride (BAC). This chemical is known to loosen the tungsten carbide.
Sharpening
Discovering in the operating room that your instruments or scissors don’t make the cut would be frustrating for anyone. Precision sharpness is an absolute prerequisite for any surgical tray. The best strategy is a proactive approach with an established routine inspection and a regular sharpening maintenance program.
Packaging, sterilization and storage
All sterile products not used again immediately (i.e. in the same room) must be sterilized in suitable packaging.
The General Requirements for packaging sterile supplies include:
Suitability for the sterilization method used
Effective protection of the sterile contents during transportation and storage.
The type of packaging used has a significant influence on sterilization results.
It is important to use only sterilization methods and sterilizers that allow validated sterilization processes.
Sterilization accessories and packaging materials must be selected in accordance with the items to be sterilized as well as with the sterilization method used.
Instruments may corrode as a result of adverse storage conditions. To prevent this they should be stored in dry and dust-free conditions.
Major temperature fluctuations should be avoided in order to prevent accumulation of moisture (condensate) on the instruments’ surfaces.
metals Chemicals may destroy when in direct contact with them, or may emit corrosive vapors. Never store your instruments near chemicals!
Proper storage requires suitable structured systems that have carefully considered allowing safe instrument storage. This not only prevents contact damage but also reduces the risk of injuries.
Closed stacking/storage systems are preferable because they provide additional protection against biological recontamination.
To guarantee instrument sterility up to the time of use on the patient, germ-tight packaging is absolutely essential.
Further requirements for protected storage of sterile supplies and prevention of corrosion damage include a dust-free and dry environment and the prevention of temperature fluctuations. Such conditions Permit storage for six months. |